A Step-by-Step Guide to Creating Stunning Acrylic Displays for Retail
By Yan Luo | Samtop Display
Website: www.samtop.com
Email: yan@samtop.com
The acrylic display manufacturing process transforms raw acrylic sheets into stunning retail fixtures that elevate brand presence. At Samtop, we specialize in custom acrylic displays that combine clarity, durability, and elegant finishes—perfect for luxury, tech, and fashion retailers.
🌍 Why Choose Acrylic for Retail Displays?
Acrylic is a highly versatile material that is widely used for custom retail displays due to its clarity, strength, and ease of fabrication. Acrylic offers crystal-clear transparency, making it ideal for showcasing products while offering lightweight durability. It’s also a cost-effective option compared to glass, as it’s shatter-resistant and easy to clean, ensuring that displays remain pristine for extended periods.
Some reasons why acrylic is popular in retail display manufacturing:
- Transparency: Perfect for creating eye-catching displays.
- Strength: Despite being lightweight, acrylic is highly durable and impact-resistant.
- Customization: Acrylic can be easily shaped and cut into various designs, making it ideal for custom retail projects.
- Cost-effective: Compared to glass, acrylic is more affordable while still offering similar aesthetics.
Visual Process Summary Table:
| Step | Process | Example Application |
|---|---|---|
| 1 | Design & Conceptualization | Luxury jewelry case |
| 2 | Material Selection | Frosted acrylic for cosmetics |
| 3 | Cutting & Shaping | Laser-cut watch stands |
| 4 | Assembly & Joining | Tech display with fasteners |
| 5 | Finishing & Customization | Engraved logos, UV coating |
| 6 | Quality Control & Shipping | Secure packaging & delivery |
🧪 Step 1: Design and Conceptualization
The design phase is the first and most crucial step in the acrylic display manufacturing process. During this stage, the client or design team works to conceptualize the size, shape, style, and features of the display. Some key aspects to consider:
- Brand identity: The design should reflect the brand’s aesthetics and communicate its message.
- Product fit: Ensure that the display is optimized to showcase the products it’s meant to hold.
- Functionality: Consider features such as adjustable shelves, lighting options, or interactive elements.
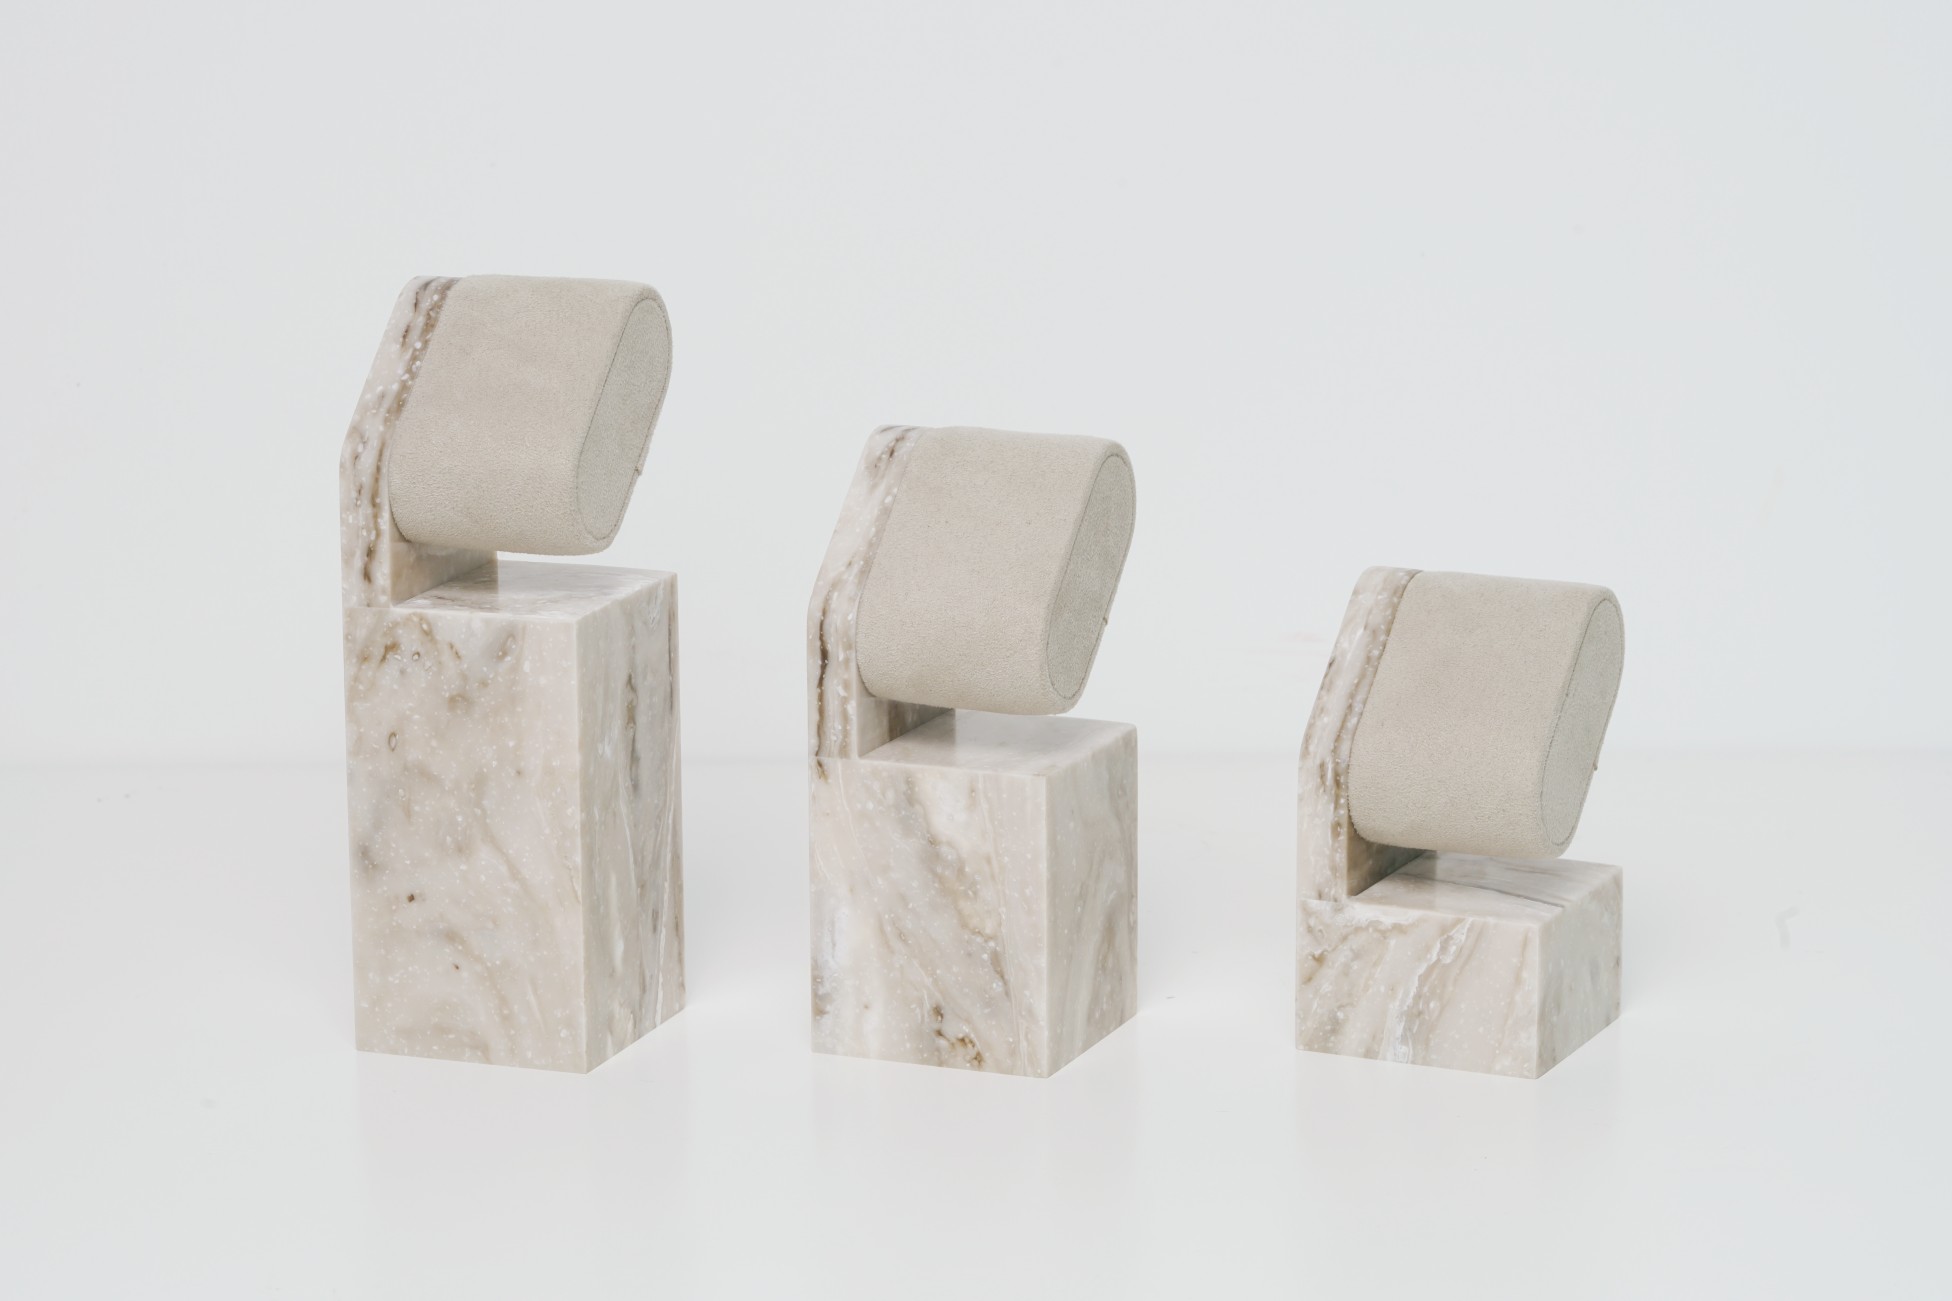
A luxury jewelry brand wants to create a custom acrylic display case for a new collection. The design will include elegant curved edges, internal LED lighting, and a minimalist aesthetic to highlight the jewelry pieces effectively.
🧪 Step 2: Material Selection
The next step is selecting the right type of acrylic for the display. Acrylic comes in several forms, each with its own set of properties:
- Clear acrylic: Most commonly used for retail displays due to its high transparency and visual appeal.
- Frosted acrylic: Offers a soft glow, ideal for creating matte finishes or soft lighting effects.
- Colored acrylic: Used for adding vibrant colors or for creating displays that match specific brand colors.
- UV-resistant acrylic: Used for displays that will be exposed to sunlight, as it prevents yellowing and degradation over time.
Example:
A cosmetic brand may choose frosted acrylic for a luxury makeup display, giving the display a more elegant, subtle appearance while keeping products clearly visible.
🧪 Step 3: Cutting and Shaping in the Acrylic Display Manufacturing Process
Once the material is selected, the acrylic sheet is cut into the desired shape and size. Various cutting methods are used, depending on the complexity of the design and the thickness of the material:
- Laser cutting: Provides precise, clean edges, ideal for intricate shapes and fine details.
- CNC routing: Used for larger, more complex shapes and to achieve precise cuts for thicker acrylic sheets.
- Waterjet cutting: Sometimes used for larger displays where laser cutting may not be as efficient.
The cutting process is followed by shaping the acrylic. Thermoforming is often used to bend or mold acrylic into specific shapes. This process uses heat to make the acrylic more pliable, allowing it to be shaped into complex curves and forms.
Example:
A high-end watch retailer may use laser cutting for the precise design of their acrylic watch display stands, ensuring the edges are smooth and polished.
🧪 Step 4: Assembly and Joining
After the pieces are cut and shaped, they are assembled into the final structure. There are several methods to join acrylic pieces together, including:
- Solvent bonding: Involves applying a chemical solvent to the acrylic pieces, which melts them slightly, allowing them to fuse together when pressed.
- Acrylic adhesives: Specialized adhesives designed for acrylic provide a strong, clear bond that doesn’t leave visible residue.
- Mechanical fasteners: In some cases, screws or bolts may be used to join the pieces, especially when the display requires additional support or when assembling larger displays.
The final structure is often reinforced at key points to ensure stability and durability.
Example:
A tech brand creates a custom acrylic phone display stand that requires mechanical fasteners at the base to hold the display securely in place.
🧪 Step 5: Finishing Touches and Customization
Once the display is assembled, the final finishing is done to enhance its appearance and ensure quality. This includes: